


In the modern landscape of Computer Networking, the Hypertext Transfer Protocol Secure (HTTPS) stands as the fundamental pillar of trust, privacy, and data integrity. As the internet evolves from simple static pages to complex Microservices and decentralized Web Services, the necessity for encrypted communication has never been more critical. Whether you are a Network Engineer architecting a global CDN, a DevOps Networking specialist managing Kubernetes clusters, or a developer building a REST API, understanding the intricate mechanics of HTTPS is non-negotiable.
HTTPS is not merely a security toggle; it is a complex interaction of protocols operating primarily at the Application Layer and Transport Layer of the OSI Model. It ensures that data traversing the public internet—across Routers, Switches, and potentially hostile WiFi networks—remains opaque to eavesdroppers while guaranteeing the authenticity of the communicating parties. In an era where Cloud Networking and AI-driven data processing are becoming ubiquitous, the integrity of the data pipeline is paramount.
This comprehensive guide explores the technical depths of the HTTPS protocol. We will dissect the TLS handshake, analyze certificate hierarchies, implement secure servers, and discuss optimization strategies for high-performance Network Architecture. We will also touch upon how HTTPS interacts with underlying technologies like TCP/IP, DNS Protocol, and IPv6 to deliver a seamless user experience.
Section 1: Core Concepts and The TLS Handshake
At its core, HTTPS is HTTP layered over the Transport Layer Security (TLS) protocol (formerly SSL). To understand HTTPS, one must first understand the cryptographic dance that occurs before any application data is exchanged. This process, known as the TLS Handshake, establishes the encryption parameters and authenticates the server.
The Mechanics of Encryption
HTTPS utilizes a hybrid approach to encryption, leveraging the strengths of both asymmetric and symmetric cryptography. Asymmetric encryption (Public Key Infrastructure) is computationally expensive and is used only during the initial handshake to exchange a shared secret. Once this secret is established, the connection switches to symmetric encryption (like AES), which is significantly faster and more efficient for transferring data payloads, reducing Latency and preserving Bandwidth.
When a client (browser or API consumer) connects to a server, the following high-level steps occur:
- Client Hello: The client sends a packet listing supported cipher suites, the TLS version, and a random byte string.
- Server Hello: The server selects the strongest common cipher suite, sends its SSL certificate (containing the public key), and its own random byte string.
- Authentication: The client verifies the certificate against its store of trusted Certificate Authorities (CAs). This prevents Man-in-the-Middle (MitM) attacks.
- Key Exchange: The client generates a pre-master secret, encrypts it with the server’s public key, and sends it. Only the server’s private key can decrypt this.
- Session Keys: Both parties generate session keys from the pre-master secret.
Network Layers and Packet Analysis
From a Network Troubleshooting perspective, understanding where HTTPS sits is vital. While IP handles Network Addressing and TCP handles reliable delivery, TLS sits between TCP and HTTP. If you were to perform Packet Analysis using Wireshark, you would see the TCP 3-way handshake (SYN, SYN-ACK, ACK) complete before the TLS Client Hello is sent.
Below is a Python example using raw Socket Programming to visualize the wrapping of a standard TCP socket with an SSL context. This demonstrates how Network Programming libraries handle the handshake under the hood.
import socket
import ssl

def basic_https_client(hostname, port=443):
    # Create a standard TCP socket (IPv4)
    # AF_INET refers to the address family (IPv4)
    # SOCK_STREAM refers to the TCP protocol
    context = ssl.create_default_context()

    with socket.socket(socket.AF_INET, socket.SOCK_STREAM) as sock:
        # Wrap the socket with SSL context
        # server_hostname is required for SNI (Server Name Indication)
        with context.wrap_socket(sock, server_hostname=hostname) as ssock:
            print(f"Connecting to {hostname} on port {port}...")
            ssock.connect((hostname, port))

            print(f"Cipher used: {ssock.cipher()}")
            print(f"SSL/TLS version: {ssock.version()}")

            # Construct a basic HTTP GET request
            request = f"GET / HTTP/1.1\r\nHost: {hostname}\r\nConnection: close\r\n\r\n"
            ssock.sendall(request.encode('utf-8'))

            # Receive data
            response = b""
            while True:
                chunk = ssock.recv(4096)
                if not chunk:
                    break
                response += chunk

            print("\n--- Response Headers (Partial) ---")
            print(response.decode('utf-8', errors='ignore').split('\r\n\r\n')[0])

if __name__ == "__main__":
    # Example target: www.python.org
    basic_https_client("www.python.org")
Section 2: Implementation and Certificate Management
For System Administration and Network Administration, the practical side of HTTPS involves managing certificates. A certificate binds a cryptographic key to an entity (a domain name). The validity of this binding is vouched for by a Certificate Authority (CA).
The Role of DNS and Validation
Before a CA issues a certificate, they must validate ownership. This often involves the DNS Protocol. In a DNS-01 challenge, the administrator adds a specific TXT record to their domain’s DNS configuration. This proves control over the Network Architecture of that domain. Modern tools like Certbot automate this, often integrating with Cloud Networking providers (AWS Route53, Cloudflare) via APIs.
Server-Side Implementation
When configuring web servers or Load Balancing proxies like Nginx or HAProxy, you must define the paths to the certificate chain and the private key. In a Microservices environment or a Service Mesh, this might be handled by a sidecar proxy.
Here is a practical example of setting up a secure HTTPS server using Node.js. This is common in Network Development for building API Design backends.
const https = require('https');
const fs = require('fs');
const express = require('express');
const app = express();
// In a real production environment, these files are generated by a CA (e.g., Let's Encrypt)
// For local development, you might use mkcert or OpenSSL
const options = {
key: fs.readFileSync('server-key.pem'),
cert: fs.readFileSync('server-cert.pem'),
// Best Practice: Disable weak protocols and ciphers
minVersion: 'TLSv1.2',
ciphers: [
'ECDHE-ECDSA-AES128-GCM-SHA256',
'ECDHE-RSA-AES128-GCM-SHA256',
'ECDHE-ECDSA-AES256-GCM-SHA384',
'ECDHE-RSA-AES256-GCM-SHA384',
].join(':'),
};
app.get('/', (req, res) => {
res.send('Secure HTTPS Server Running
Data is encrypted.
');
});
app.get('/api/data', (req, res) => {
res.json({
status: "secure",
protocol: req.protocol,
cipher: req.socket.getCipher()
});
});
// Create the HTTPS server
const PORT = 443; // Requires root privileges on most systems
https.createServer(options, app).listen(PORT, () => {
console.log(`Secure server listening on port ${PORT}`);
});To generate the certificates referenced above for a local testing environment (simulating a DevOps Networking workflow), you would use OpenSSL. This is a standard Network Command available on Linux and macOS.
# Generate a private key
openssl genrsa -out server-key.pem 2048

# Generate a Certificate Signing Request (CSR)
openssl req -new -key server-key.pem -out server.csr \
    -subj "/C=US/ST=State/L=City/O=Organization/CN=localhost"

# Generate a Self-Signed Certificate (valid for 365 days)
openssl x509 -req -days 365 -in server.csr -signkey server-key.pem -out server-cert.pem

# Verify the certificate content
openssl x509 -in server-cert.pem -text -noout
Section 3: Advanced Techniques and Protocol Evolution
The internet is not static. As Network Performance demands increase—driven by high-definition video, real-time Travel Tech applications, and massive data synchronization for Remote Work—HTTPS has evolved.
HTTP/2, HTTP/3, and QUIC
Traditional HTTPS (over TCP) suffers from Head-of-Line blocking. If one packet is lost, the entire connection waits. HTTP/2 introduced multiplexing, allowing multiple requests over a single TCP connection. However, HTTP/3 pushes this further by abandoning TCP entirely in favor of QUIC, which runs over UDP.
QUIC integrates TLS 1.3 encryption directly into the transport layer. This reduces the handshake overhead significantly (often achieving 0-RTT, or Zero Round Trip Time, for resumed connections). For Network Engineers, this means Firewalls must be configured to allow UDP traffic on port 443, not just TCP.
Client-Side Verification and Pinning
In high-security Mobile Development or API Security contexts, simply trusting the system’s CA store might not be enough. Certificate Pinning ensures that the client only accepts a specific certificate or public key, mitigating attacks where a rogue CA issues a fraudulent certificate.
Below is an example using Python and the `requests` library to perform strict verification, a technique useful in Network Automation scripts or secure Web Services clients.
import requests
from requests.adapters import HTTPAdapter
from urllib3.util.ssl_ import create_urllib3_context

# Custom Adapter to enforce specific TLS versions and ciphers
class SecureAdapter(HTTPAdapter):
    def init_poolmanager(self, *args, **kwargs):
        context = create_urllib3_context()
        # Enforce TLS 1.2 or higher
        context.options |= 0x4000000  # OP_NO_TLSv1
        context.options |= 0x8000000  # OP_NO_TLSv1_1

        # Example: Setting specific cipher suites (High security)
        context.set_ciphers('ECDHE-ECDSA-AES256-GCM-SHA384:ECDHE-RSA-AES256-GCM-SHA384')

        kwargs['ssl_context'] = context
        return super(SecureAdapter, self).init_poolmanager(*args, **kwargs)

# Usage
session = requests.Session()
session.mount('https://', SecureAdapter())

try:
    # 'verify' can be a path to a specific CA bundle or False (insecure)
    # In a pinned scenario, you would verify against a specific local cert file
    response = session.get('https://api.github.com', verify=True)

    print(f"Status Code: {response.status_code}")
    print(f"Headers: {response.headers['Strict-Transport-Security']}")

except requests.exceptions.SSLError as e:
    print(f"SSL Verification Failed: {e}")
except Exception as e:
    print(f"Connection Error: {e}")
Section 4: Best Practices and Optimization
Implementing HTTPS is easy; implementing it correctly and efficiently requires expertise. Poorly configured HTTPS can introduce Latency and security vulnerabilities.
HSTS (HTTP Strict Transport Security)
To prevent protocol downgrade attacks (where an attacker forces a browser to use HTTP), servers should send the `Strict-Transport-Security` header. This tells the browser, “Never talk to me over HTTP again, for a specified period.” This is crucial for API Security and protecting user sessions in Digital Nomad environments where public WiFi is common.
Certificate Rotation and Automation

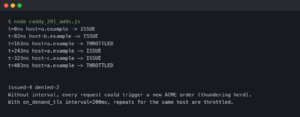
Certificates expire. An expired certificate causes service outages and erodes trust. In modern Software-Defined Networking (SDN) and containerized environments, manual rotation is impossible. Tools like Cert-Manager for Kubernetes or HashiCorp Vault should be used to automate issuance and rotation. This aligns with DevOps Networking principles of “Infrastructure as Code.”
Performance Tuning
Encryption costs CPU cycles. To optimize:
- TLS Termination: Offload decryption to a dedicated Load Balancing layer or CDN (like Cloudflare or AWS CloudFront) to free up application servers.
- Session Resumption: Use TLS session tickets to avoid performing a full handshake for returning clients.
- OCSP Stapling: Have the server fetch the revocation status of its own certificate and staple it to the handshake, saving the client a separate DNS lookup and connection.
Below is a snippet demonstrating how to configure a Java client (common in enterprise Network Architecture) to handle SSL Contexts, emphasizing the importance of trust stores.
import javax.net.ssl.SSLContext;
import javax.net.ssl.TrustManagerFactory;
import java.io.FileInputStream;
import java.security.KeyStore;
import java.net.http.HttpClient;
import java.net.http.HttpRequest;
import java.net.http.HttpResponse;
import java.net.URI;

public class SecureClient {

    public static void main(String[] args) throws Exception {
        // Load a custom KeyStore (TrustStore)
        // This is essential for internal networks or self-signed architectures
        KeyStore keyStore = KeyStore.getInstance(KeyStore.getDefaultType());
        try (FileInputStream fis = new FileInputStream("my-truststore.jks")) {
            keyStore.load(fis, "password".toCharArray());
        }

        // Initialize TrustManager with the KeyStore
        TrustManagerFactory tmf = TrustManagerFactory.getInstance(TrustManagerFactory.getDefaultAlgorithm());
        tmf.init(keyStore);

        // Create SSLContext using TLS 1.3
        SSLContext sslContext = SSLContext.getInstance("TLSv1.3");
        sslContext.init(null, tmf.getTrustManagers(), null);

        // Build the HttpClient
        HttpClient client = HttpClient.newBuilder()
                .sslContext(sslContext)
                .build();

        HttpRequest request = HttpRequest.newBuilder()
                .uri(URI.create("https://internal-api.local/resource"))
                .build();

        HttpResponse response = client.send(request, HttpResponse.BodyHandlers.ofString());

        System.out.println("Response Code: " + response.statusCode());
        System.out.println("Body: " + response.body());
    }
}
Conclusion
HTTPS is the bedrock of the secure internet. From protecting credit card transactions to securing the “shared brain” of decentralized AI networks, the protocol’s importance cannot be overstated. As we move toward Web3 and increasingly complex Network Virtualization, the lines between Network Security and application logic continue to blur.
For the Network Engineer and developer alike, mastery of HTTPS involves more than just installing a certificate. It requires a deep understanding of the OSI Model, Packet Analysis, cipher suites, and the evolving standards of HTTP/3. By implementing the best practices outlined here—such as HSTS, automated rotation, and proper API Security—you ensure that your digital infrastructure is robust, performant, and worthy of user trust. As Edge Computing and IoT continue to expand, the principles of secure, encrypted communication will remain the defining characteristic of a professional Network Architecture.